How to Schedule Appointments on the Calendar (Daily Dispatch)
Last updated July 6, 2026 · Admins, office staff, and crew managers
The Daily Dispatch page (Scheduler menu) is where you place work on the calendar, move it around, and mark it done. This article covers creating appointments (three ways), editing and moving them, recurring appointments, completing, deleting, and moving a visit to a different crew. For route-style stop ordering, see Route Management.
Before you start
- At least one Active crew must exist — only active crews appear on the dispatch board and in crew dropdowns. See Manage Crews.
- The job you want to schedule must already exist (appointments are always attached to a job). See the Jobs articles.
- Know your crew’s type: crew cards on the dispatch board are labeled “Time-based calendar” (appointments with start/end times) or “Route-style calendar” (date-only visits). The calendar behaves slightly differently for each — noted below where it matters.
The Daily Dispatch board
- Go to Scheduler to open Daily Dispatch.
- Use the Today / Tomorrow pills in the Dispatch Board header to pick the day you’re dispatching.
- Click a crew card to load that crew’s calendar. (The first crew loads automatically when the page opens.) You can also use the Crew Type and Crew dropdowns below the cards.
- The calendar loads with Day / Week / Work Week / Month / Agenda view buttons along the top. On a phone, the calendar automatically switches to the Agenda (list) view.
- On the right is the Non Scheduled Jobs sidebar — every visit that was created with “Schedule Later” and is waiting for a date, with a count badge.
Header shortcuts: Route Management, All Appointments, and (when crew mobile features are enabled) Crew Mobile View.
Create an appointment
Method 1 — Drag from Non Scheduled Jobs (fastest)
- On Daily Dispatch, select the crew.
- Drag a card from the Non Scheduled Jobs sidebar onto a calendar cell (the day/time you want).
- The appointment editor opens pre-filled with the job, customer, and crew. Adjust Start/End (time-based crews) or the Date (route-style crews), add a Description if needed, and save.
- The card disappears from the sidebar and the visit appears on the calendar.
If you cancel the editor, nothing is created and the card stays in the sidebar.
Method 2 — “Schedule Appointment” from a Job or Customer page
- Open the job (Job Summary) or the customer (Customer Summary) and click Schedule Appointment. You land on the Create Appointment page.
- Fill in the form:
| Field | Required | Notes |
|---|---|---|
| Select Job | Yes | Pre-selected if you came from a job; pick from the customer’s jobs if you came from a customer. |
| Schedule Time Based? | — | Yes shows Start Time / End Time fields; No creates a date-only route visit. This also filters the crew list to matching crews. |
| Schedule Later? | — | Toggle on to create the visit with no date — it goes to the Non Scheduled Jobs sidebar to be dragged onto the calendar later. Turning it on hides the date, time, and recurrence fields. |
| Select Crew | Yes (unless Schedule Later) | Only crews matching your time-based choice appear. If none exist you’ll see “No crews available” with a link to create one. |
| Scheduled Date | Yes (unless Schedule Later) | Date picker. |
| Start Time / End Time | Yes when time-based | Shown only when Schedule Time Based = Yes. |
| Recurrence Template | No | Pick a saved pattern (e.g. weekly program templates) to pre-fill the recurrence editor, or build a pattern manually below it. Leave as “None” for a one-off visit. |
| Description | No | Free-text notes shown on the appointment. |
- Click Create Appointment (or Cancel / Back to leave without saving).
Method 3 — Click an empty calendar cell
Clicking an empty slot on the calendar opens a small “Add Appointment” popup for that slot. In practice, methods 1 and 2 are the reliable paths because an appointment must be tied to a job — prefer them.
View and edit an appointment
- Click an appointment on the calendar to open its quick popup: subject, status badge, proof-of-work state, customer, and address, with three buttons — Mark Complete (or Mark Active if it’s already completed), More Details, and View Job.
- Click More Details to open the full editor: Summary and Customer (read-only), Start/End (or Date on route-style calendars), Recurrence, Crew (read-only here — see “Move a visit to a different crew” below), Status (Completed / Active), and Description.
- Drag an appointment to another day/time, or drag its edge to resize (time-based calendars), to reschedule it. Changes save automatically and you’ll see an “Appointment updated successfully” toast.
Rules the calendar enforces
- Start and end must be on the same day. Multi-day appointments aren’t supported — you’ll get a “Start and end dates must be on the same day” dialog. Create one visit per day instead.
- Time-based appointments can’t exceed 8 hours. Longer bookings are rejected with “Appointments longer than 8 hours must be split into shorter visits.”
- End time must be after start time.
Recurring appointments
- Set a pattern in the Recurrence section of the editor (or pick a Recurrence Template on the Create Appointment page). The visit then repeats automatically — daily, weekly, monthly, etc.
- When you edit or delete a recurring appointment, the calendar asks whether you mean this event only or the entire series. Editing one occurrence detaches just that day; the rest of the series is untouched.
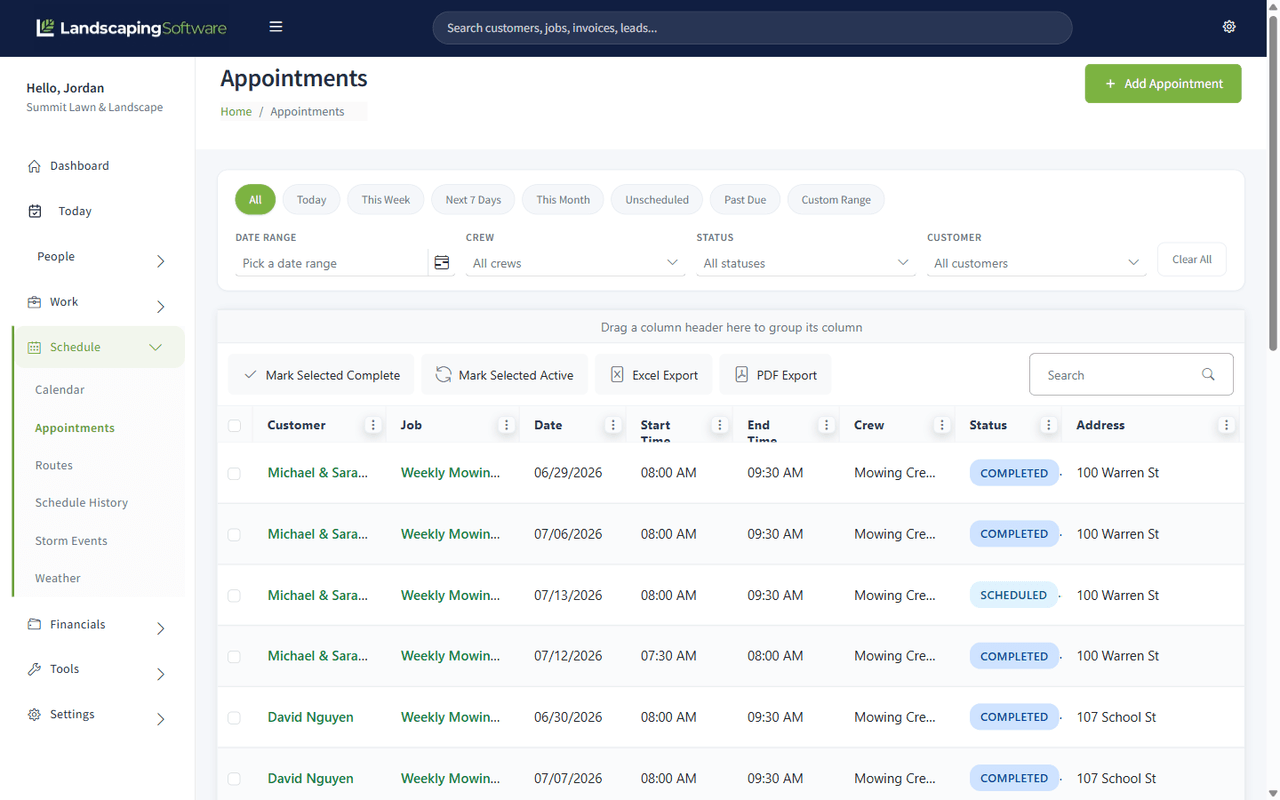
- On the dispatch calendar, the quick popup’s Mark Complete button is hidden for a recurring series — complete individual dates from the All Appointments grid instead, where each occurrence is its own row. (Detached single occurrences can still be completed from the calendar.)
Complete or delete
- Complete: click the appointment → Mark Complete. The event turns green. Click again and choose Mark Active to undo. (More completion options, including bulk, are in Visit Actions.)
- Delete: open the appointment and use its delete option. A confirmation dialog warns “This action cannot be undone” — click Delete to confirm or Cancel to keep it.
Move a visit to a different crew
The crew field is read-only in the calendar editor. To reassign a visit:
- Open the job (Job Summary) and go to its Schedule tab.
- Click the appointment to open the View Appointment modal.
- Pick the new crew in the Crew dropdown and click Save changes.
The visit moves to the other crew’s calendar. (Note: the “Time Based” choice must match a crew of that type — the crew dropdown only lists matching crews.)
What happens next
- New appointments appear immediately on the selected crew’s calendar and in the All Appointments directory; drag-created ones also disappear from the Non Scheduled Jobs sidebar.
- After creating from the Create Appointment page you’re returned to the Job Summary with a success message.
- Every create, move, edit, complete, and delete is recorded in the visit’s change History (visible from the All Appointments grid), so you can always answer “who moved this appointment?”
Tips & best practices
- Use “Schedule Later” as your backlog. Create visits without dates as work comes in, then drag them onto the calendar on dispatch day.
- Use recurrence templates for programs (weekly mowing, monthly treatments) instead of rebuilding the same pattern by hand.
- Completed events show green, unordered/orange states stand out — a quick scan of the week tells you what’s done.
- Keep an eye on the Non Scheduled Jobs count badge — it’s your “still needs a date” queue.
Troubleshooting
- The crew card / dropdown doesn’t show my crew — the crew is probably marked Inactive, or you’re filtered to the wrong Crew Type (time-based vs non-time-based). Check the crew’s settings.
- “Start and end dates must be on the same day” — you dragged or edited an appointment across midnight. Split it into one visit per day.
- “Appointments longer than 8 hours must be split into shorter visits” — shorten the time window or create two visits.
- “No crews available” on the Create Appointment page — no crew matches your Yes/No time-based choice. Use the inline link to create a crew of that type first.
- Mark Complete is missing on a calendar event — it’s a recurring series. Complete individual dates from All Appointments.
- Dragged a job onto the calendar but cancelled the editor and now the card looks stuck — the card re-enables itself automatically after a few moments; if not, reload the page.
- “Failed to create/update appointment” — the save didn’t reach the server; the calendar re-syncs itself. Try again, and contact support if it persists.
Related articles
- Scheduling Overview — the two scheduling modes
- Route Management — stop order for route-style crews
- Visit Actions — complete, revert, bulk updates, rain shift, history
- Manage Crews — create crews and set the Time Based flag